Canvas Overview
You can think of the Canvas as a 'business plan on a page'. Through your customer discovery process your Canvas will evolve as you uncover insights that help validate or invalidate your hypotheses. All changes you make the the Canvas are automatically saved and can be reviewed with the date slider or the week menu. You can also export the Canvas in JSON format to migrate your data to another team or save for future use in the platform.
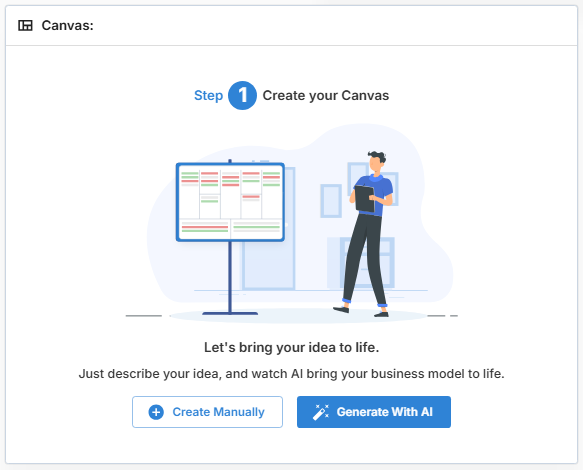
Creating Your Canvas
You can create a Canvas in two ways depending on how you want to start — manually or with AI assistance.
You can also navigate directly to Canvas from the side bar:

Option 1: Create Manually
If you prefer to build your Canvas step by step:
- Go to the Home page
-
Click Create Manually in the Canvas section
— or —
Navigate to Canvas from the left sidebar
- Start adding your own hypotheses directly into each section
This approach gives you full control and is useful when:
- You already have a clear idea
- You want to structure your own thinking
- You prefer to define assumptions before using AI
Option 2: Generate with AI
If you want to get started quickly or expand your thinking:
- Go to the Home page
-
Click Generate With AI
— or —
Open Canvas and click the magic wand icon

- Enter a brief description of your idea, including:
- Customer segments
- The problem you're solving
- Any important context

- Click Generate Canvas
Understanding the AI-Enhanced Idea Statement
After you enter your idea, the platform presents:
- Your original idea statement
- An AI-enhanced version
side by side.
The AI-enhanced version:
- Refines unclear or fragmented wording
- Adds structure and clarity
- Produces stronger inputs for Canvas generation
You can choose either version before generating your Canvas.
👉 In practice, most users choose the AI-enhanced version, as it leads to higher-quality and more complete hypotheses.

In just a few short minutes your Canvas will be ready.

For a more hands-on approach you can choose to review each section of the Canvas.

Locate the magic wand icon within each Canvas section to review the suggested hypotheses for them. Select the hypotheses you want to add to your Canvas then click "Accept" and/or select hypotheses that you don't want to include and click "Reject".
Remember, if a hypothesis is testable and relevant to your idea it is better to seek invalidation than to reject it outright.

Unapproved hypotheses will still show as pending when you go back to the Canvas, so if you don't want to focus on them, but want to revisit them later, you may want to leave them in this state.
At any point you can also approve all hypotheses by clicking the button at the top of the Canvas.

Canvas Description
Use the Canvas Description field at the top of the page to briefly explain your idea and the context behind it. This description helps instructors, teammates, and other stakeholders quickly understand what your Canvas represents and what you are working to explore or validate.
Click the placeholder text in the upper-left area of the Canvas to add or edit your description at any time.

Choosing a Canvas View
You can choose which Canvas view you want to work in from the view dropdown at the top of the Canvas.
Available options may include:
- Complete Canvas
- Skinny Canvas
- Canvas Variants (if your Canvas has additional saved variations)
This allows you to switch between the full Canvas, the simplified Skinny Canvas, or any other available variant without leaving the page.
Complete Canvas
Use this view when you want to see the full set of Canvas sections and work across all hypotheses.
Skinny Canvas
Use this view when you want to focus only on the most important early-validation sections of the Canvas.
Canvas Variants
If additional variants are available, you can select them from the same dropdown. This helps you review or work with different Canvas versions as needed.

Adding Hypotheses
Have your own hypotheses to add to the Canvas? Click within any Canvas section or the + icon to add your own hypotheses.

Reordering Hypotheses
Once you add a few hypotheses, you can reorder them via the drag icon that appears when you hover over a hypothesis.

Linking Hypotheses to Customer Segments
Each hypotheses on your Canvas should be linked to a Customer Segment. Click on the link icon and select the Customer Segments that apply. These connections demonstrate an understanding of how your hypotheses relate to your customers!

Validating/Invalidating Hypotheses
When you have found sufficient insights that support or don't support your hypotheses, you may decide to validate or invalidate them by clicking on the check or X icons in the hover over menu.

Commenting on Hypotheses
Instructors and Team Members can use the commenting feature to provide feedback on any hypothesis with the Add/View Feedback icon.

Team members will be notified of Instructor comments and Instructors will be notified of team member comments in their Notifications menu.

Understanding Hypothesis Sources/Authorship's
Each hypothesis on your Canvas can show how it was created:
- AI-generated
- Human-created
- Modified (AI + Human)
You can show or hide this information using the Show Created By (AI, Human) option in the gear menu.
Why This Matters
This helps both users and instructors understand how the Canvas is being developed.
For teams:
- See which ideas came from AI versus your own thinking
- Track how AI-generated hypotheses have been refined or changed
For instructors:
- Quickly assess how a team is working
- Identify whether the team is engaging with AI suggestions thoughtfully or simply accepting everything as-is
A strong Canvas is often a combination of both:
- AI to generate breadth
- Human input to refine and prioritize
Viewing Insights
See how your customer discovery interviews connect back to your Canvas by opening the linked Insights for a hypothesis.
When you view linked insights, you can:
- See all linked insights
- View supporting insights
- View non-supporting insights
This helps you understand whether the available evidence supports or challenges a hypothesis.
If an insight was generated from a simulated interview, it will display a Simulated badge. This makes it easier to distinguish simulated insights from insights created from real interviews.
Use these linked insights to decide whether a hypothesis should remain unresolved, be validated, or be invalidated.

Using Simulated Insights on the Canvas
Simulated insights can also appear on the Canvas when they are linked to a hypothesis.
When enabled:
- Simulated insights are included in the linked insight view
- Simulated insights are marked with a Simulated badge
- You can compare simulated evidence with evidence from real interviews
If you do not want simulated insights to appear on the Canvas, you can turn them off using Show Simulated Insights in the gear menu.
This gives you more control over how you review evidence during validation.
Exporting the Canvas
Export the Canvas in a JSON format to migrate your data to another team or save for future use in the platform. If you need a screenshot of your Canvas, close all side panels (organization tree, Chat, etc) and zoom out until you see all hypotheses. You can also try the Print to PDF feature of your browser where you can scale the export to your preferred size:

Toggle Canvas View Options
Use the gear menu on the Canvas to access additional view and display options.
From this menu, you can:
-
Import (JSON)
Import a Canvas in JSON format.
-
Export (JSON)
Export your Canvas in JSON format to migrate it to another team or save it for future use in the platform.
-
Show Comment Count
Display the number of comments attached to each hypothesis.
-
Show Linked Insight Count
Display the number of linked insights for each hypothesis.
-
Show Linked Hypothesis Count
Display the number of linked hypotheses.
-
Show Simulated Insights
Show or hide simulated insights on the Canvas. This helps you control whether simulated interview evidence appears alongside real interview evidence.
-
Show Created By (AI, Human)
Show or hide the authorship label for each hypothesis so you can see whether it was created by AI, by a human, or modified through both.
These options help you customize the Canvas view based on what you want to focus on while reviewing hypotheses and evidence.

Canvas FIltering Options
By default all of your Hypotheses are visible on the Canvas no matter their state. Use this menu to select which specific states you want to view.
Look at your successes by showing Validated Hypotheses or hide them to focus on other states.
Review Invalidated Hypotheses to see what you've moved on from or hide them to keep them from taking up space.
Focus on Unresolved Hypotheses to work on gathering evidence to decide whether or not to validate or invalidate them or hide them to review the Hypotheses you've finalized.

Should I Create My Canvas Manually or Use AI?
The best approach is to use both.
Each method serves a different purpose, and combining them gives you the strongest result.
Start Manually
Begin by adding your own hypotheses to the Canvas.
This helps you:
- Clarify your thinking
- Capture your current understanding of the problem, customer, and value
- Make your assumptions explicit
Then Use AI
Once you’ve added your initial ideas, use Generate With AI.
AI will:
- Expand on your input
- Suggest additional hypotheses
- Surface perspectives you may not have considered
Merge the Two
Review the AI-generated hypotheses alongside your own.
- Keep what is relevant
- Refine what needs adjustment
- Ignore what doesn’t apply
👉 This combined approach gives you:
- Your own understanding and context
- Plus AI’s ability to broaden and challenge your thinking
Using both together leads to a more complete and testable Canvas than relying on either approach alone.